Redmine as project management on OpenBSD
Redmine is a web-based project management and bug-tracking tool, it includes calendar and Gantt charts to aid visual representation of projects and their deadlines and supports multiple projects. The integration throughout the entire system is excellent and we can create nested subprojects and move issues/tickets from one project to another. For each project we are able to assign different users and turn certain functionality (milestones, time tracking, source control,..) on and off. This article describes how to install Redmine on OpenBSD 4.9. We will be using the official OpenBSD port from CVS. We will start by installing the prerequisites as binaries because if you have a fast internet connection, it is faster than building the ports from src. Lets install Ruby-On-Rails:
pkg_add -i ruby-1.9.2.136p0
pkg_add ruby-gems
Official releases include the appropriate Rails version in their vendor directory. So no particular action is needed. If we checkout the source from the Redmine repository, we can install a specific Rails version on your machine by running:
gem18 install rails -v=2.3.11
Install Rack:
gem28 install rack -v=1.1.0
gem18 install -v=0.4.2 i18n
gem18 install mysql
Redmine
It is recommended that the majority of users install the proper point releases of red mine. It is not recommended to install redmine from trunk.
Installation procedure
- Get the Redmine source code by either downloading a packaged release or checking out the code repository. See Download.
- Create an empty database and accompanying user named ”redmine” for example.
create database redmine character set utf8;
create user ‘redmine’@'localhost’ identified by ‘my_password’;
grant all privileges on redmine.* to ‘redmine’@'localhost’;
- Copy config/database.yml.example to config/database.yml and edit this file in order to configure your database settings for “production” environment. Example for a MySQL database (we have also to specify the mysql socket file):
production:
adapter: mysql
database: redmine
host: localhost
port: 3307
username: redmine
socket: /var/www/var/run/mysql/mysql.sock
password: my_password
- Generate a session store secret.
rake generate_session_store
- Create the database structure, by running the following command under the application root directory. It will create tables and an administrator account.
RAILS_ENV=production rake db:migrate
- Insert default configuration data in database, by running the following command:
RAILS_ENV=production rake redmine:load_default_data
- Test the installation by running WEBrick web server:
ruby script/server webrick -e production
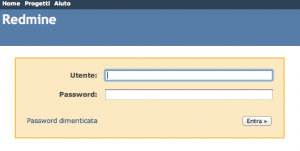
Once WEBrick has started, point your browser to http://localhost:3000/. You should now see the application welcome page:
