Archivio

Archivio autore

Redmine as project management on OpenBSD

7 agosto 2011 Nessun commento

Redmine is a web-based project management and bug-tracking tool, it includes calendar and Gantt charts to aid visual representation of projects and their deadlines and supports multiple projects. The integration throughout the entire system is excellent and we can create nested subprojects and move issues/tickets from one project to another. For each project we are able to assign different users and turn certain functionality (milestones, time tracking, source control,..) on and off. This article describes how to install Redmine on OpenBSD 4.9. We will be using the official OpenBSD port from CVS. We will start by installing the prerequisites as binaries because if you have a fast internet connection, it is faster than building the ports from src. Lets install Ruby-On-Rails:

pkg_add -i ruby-1.9.2.136p0

pkg_add ruby-gems

Official releases include the appropriate Rails version in their vendor directory. So no particular action is needed. If we checkout the source from the Redmine repository, we can install a specific Rails version on your machine by running:

gem18 install rails -v=2.3.11

Install Rack:

gem28 install rack -v=1.1.0

gem18 install -v=0.4.2 i18n

gem18 install mysql

Redmine

It is recommended that the majority of users install the proper point releases of red mine. It is not recommended to install redmine from trunk.

Installation procedure

  • Get the Redmine source code by either downloading a packaged release or checking out the code repository. See Download.
  • Create an empty database and accompanying user named ”redmine” for example.

create database redmine character set utf8;
create user ‘redmine’@'localhost’ identified by ‘my_password’;
grant all privileges on redmine.* to ‘redmine’@'localhost’;

  • Copy config/database.yml.example to config/database.yml and edit this file in order to configure your database settings for “production” environment. Example for a MySQL database (we have also to specify the mysql socket file):

production:
adapter: mysql
database: redmine
host: localhost
port: 3307
username: redmine
socket: /var/www/var/run/mysql/mysql.sock
password: my_password

  • Generate a session store secret.

rake generate_session_store

  • Create the database structure, by running the following command under the application root directory. It will create tables and an administrator account.

RAILS_ENV=production rake db:migrate

  • Insert default configuration data in database, by running the following command:

RAILS_ENV=production rake redmine:load_default_data

  • Test the installation by running WEBrick web server:

ruby script/server webrick -e production

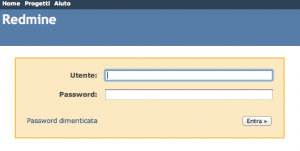
Once WEBrick has started, point your browser to http://localhost:3000/. You should now see the application welcome page:

redmine login

Fuzzy hashing PHP Extension on OpenBSD 4.9

30 giugno 2011 Nessun commento

For years, computer forensic investigators have put a great deal of stock in the effectiveness of MD5 hashing. Now to quantify that statement, I mean specifically using MD5 hashes to identify known malicious files. The key word in that sentence is known, but let’s take that one step further to add the word “unmodified” known files. One minor change to a file, and the MD5 hash is now completely different, rendering the investigators search totally ineffective. So, what’s the answer? Easy, fuzzy hashing.

Fuzzy hashing allows the discovery of potentially incriminating documents that may not be located using traditional hashing methods. The use of the fuzzy hash is much like the fuzzy logic search; it is looking for documents that are similar but not exactly the same, called homologous files. Homologous files have identical strings of binary data; however they are not exact duplicates. An example would be two identical word processor documents, with a new paragraph added in the middle of one. To locate homologous files, they must be hashed traditionally in segments to identify the strings of identical data.

Download the ssdeep package from the following link. Once you downloaded it you have to extract and compile the package. The commands to perform these operations are:

wget http://downloads.sourceforge.net/project/ssdeep/ssdeep-2.6/ssdeep-2.6.tar.gz?r=http%3A%2F%2Fssdeep.sourceforge.net%2F&ts=1309466525&use_mirror=ovh

tar zxvfp ssdeep-2.6.tar.gz

and then

./configure && make && make install

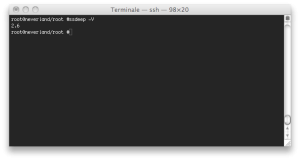
Once you finished to install the tool you can perform this test: (ssdeep -V)

We have installed the ssdeep tool and it’s time to proceed to install the ssdeep PHP extension. Before to proceed you have to install the pear and the autoconf packages in order to allow you to use the pecl command:

pkg_add -i pear-1.7.2

pkg_add -i autoconf

export AUTOCONF_VERSION=2.64

After that you can try to install the PHP extension with the pecl system (pecl install ssdeep) but on my side I raised some issue related to the name of the libfuzzy.so and the error was

checking for ssdeep… configure: error: “Could not find ‘libfuzzy.so’. Try specifying the path to the ssdeep build directory.”

If you check in the /usr/local/lib folder you should find instead the libfuzzy.so.2.0 library. In order to avoid this issue I decided to install the extension manually. I download the pecl package from the original path (here the link to download it). Once you downloaded the package you have to extract it and run the command related to PHP. Here below the commands required:

wget http://pecl.php.net/get/ssdeep-1.0.2.tgz

tar zxvfp ssdeep-1.0.2.tar.gz

cd ssdeep-1.0.2

phpize

./configure

As you can see from the configure output you raised the same error, so you have to edit the configure file and change the name of the libfuzzy.so required with the libfuzzy.so.2.0 at line 4174.

SSDEEP_LIB_FILENAME=”lib$SSDEEP_LIB_NAME.so.2.0″

Now you have to perform the make and make install command

make && make install

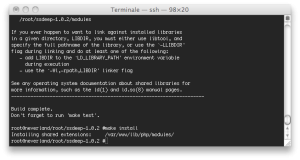
You should get the following message from the shell:

The last step is to add the ssdeep.so extension in the php.ini:

nano /var/www/conf/php.ini

and add the following line in the extension section:

extension=ssdeep.so

Once you saved the file you have to restart the Apache service:

apachectl stop

apachectl start

If you check the phpinfo file, you should get the following section:

If you want to check the fully functionality of the extension installed you can copy the “example.php” file stored in the pecl package and run it into your webserver. In order to do that you have to perform this command (we supposed to be in ssdeep-1.0.2 folder):

mv examples/example.php /var/www/htdocs/

and the output should be this:

Common Event Format (CEF)

16 aprile 2011 Nessun commento

Each vendor has its own format for reporting event information, these event formats often lack the key information necessary to integrate the events from their devices. The ArcSight standard attempts to improve the interoperability of infrastructure devices by aligning the logging output from various technology vendors. The Common Event Format (CEF) is an open log management standard that improves the interoperability of security-related information from different security and network devices and applications. To simplify integration, the syslog message format is used as a transport mechanism. This applies a common prefix to each message, containing the date and hostname, as shown below.

Mar 16 16:35:23 host message

If an event producer is unable to write syslog messages, it is still possible to write the events to a file. To do so:

  1. Omit the syslog header (show above);
  2. Begin the message with the format show below

CEF:Version|Device Vendor|Device Product|Device Version|Signature ID|Name|Severity|Extension

After the mandatory CEF: prefix, the remainder of the message is formatted using a common prefix composed of fields delimited by a bar (“|”) character. The Extension part of the message is a placeholder for additional fields.

Definitions of prefix fields

Version is an integer and identifies the version of the CEF format. Event consumers use this information to determine what the following fields represent.

Device Vendor, Device Product and Device Version are strings that uniquely identify the type of sending device. No two products may use the same device-vendor and device-product pair. There is no central authority managing these pairs. Event producers have to ensure that they assign unique name pairs.

Signature ID is a unique identifier per event-type. This can be a string or an integer. Signature ID identifies the type of event reported. In the intrusion detection system (IDS) world, each signature or rule that detects certain activity has a unique signature ID assigned. This is a requirement for other types of devices as well, and helps correlation engines deal with the events.

Name is a string representing a human-readable and understandable description of the event. The event name should not contain information that is specifically mentioned in other fields. For example: “Port scan from 10.0.0.1 targeting 20.1.1.1” is not a good event name. It should be: “Port scan”. The other information is redundant and can be picked up from the other fields.

Severity is an integer and reflects the importance of the event. Only numbers from 0 to 10 are allowed, where 10 indicates the most important event.

Extension is a collection of key-value pairs. The keys are part of a predefined set. The standard allows for including additional keys as outlined under “The Extension Dictionary”. An event can contain any number of key- value pairs in any order, separated by spaces (“ “). The following example illustrates a CEF message using Syslog transport:

Mar 16 16:43:10 host CEF:0|security|threatmanager|1.0|100|trojan successfully stopped|10|src=10.0.0.192 dst=12.121.122.82 spt=1232

Character encoding

Because CEF uses the UTF-8 Unicode encoding method, please note the following:

  • The entire message has to be UTF-8 encoded.
  • If a pipe (|) is used in the prefix, it has to be escaped with a backslash (\). But note that pipes in the extension do not need escaping. For example:

Mar 16 16:26:45 host CEF:0|security|threatmanager|1.0|100|detected a malware \| in message|10|src=10.0.0.192 act=blocked a | dst=12.1.1.1

  • If a backslash (\) is used in the prefix or the extension, it has to be escaped with another backslash (\). For example:

Mar 16 16:46:10 host CEF:0|security|threatmanager|1.0|100|detected a malware \\ in packet|10|src=10.0.0.192 act=blocked a \\ dst=1.1.1.1

  • If an equal sign (=) is used in the extensions, it has to be escaped with a backslash (\). Equal signs in the prefix need no escaping. For example:

Mar 16 16:46:10 host CEF:0|security|threatmanager|1.0|100|detected a malware \= in packet|10|src=10.0.0.192 act=blocked a \= dst=1.1.1.1

  • Multi-line fields can be sent by CEF by encoding the newline character as \n or \r. Note that multiple lines are only allowed in the value part of the extensions. For example:

Mar 16 16:46:10 host CEF:0|security|threatmanager|1.0|100|detected a malware \n in packet|10|src=10.0.0.192 msg=blocked a \n No action needed dst=1.1.1.1

Preventing Duplicate Content

17 marzo 2011 Nessun commento

Duplicate content is a problem with many websites, and most webmasters don’t realise they are doing anything wrong. Most search engines want to provide relevant results for their users, it’s how Google got successful. If the search engine was to return five identical pages on the same page of the search results, it’s not likely to be useful to the searcher. Many search engines have filters in place to remove the duplicate listings – this keeps their search results clean, and is overall a good feature. From a webmaster’s point of view however, you don’t know which copy of the content the search engine is hiding, and it can put a real damper on your marketing efforts if the search engines won’t show the copy you are trying to promote. A common request is to be able to remove or redirect the “index.php” from appearing in the url. This is possible only with server-side technology like “.htaccess” configuration files or your main server config by using the Mod_Rewrite Rewrite Module. Duplicate content occurs when the search engine finds identical content at different URLs like:

www and non-www

http://www.iwebdev.it and http://iwebdev.it

In most cases these will return the same page, in other words, a duplicate of your entire site.

root and index

http://www.iwebdev.it (root) and http://iwebdev.it/index.php

Most people’s homepages are available by typing either URL – duplicate content.

Session IDs

http://www.iwebdev.it/project.php?PHPSESSID=24FD6437ACE578FEA5745

This problem effects many dynamic sites, including PHP, ASP and Cold Fusion sites. Many forums are poorly indexed because of this as well. Session IDs change every time a visitor comes to your site. In other words, every time the Search engine indexes your site, it gets the same content with a different URL. Amazingly, most search engines aren’t clever enough to detect this and fix it, so it’s up to you as a webmaster.

One page, multiple URLs

http://www.iwebdev.it/project?category=web&product=design and http://www.iwebdev.it/project.php?category=software&product=design

A product may be allocated to more than one category – in this case the “product detail” page is identical, but it’s available via both URLs.

Removing Duplicate Content
Having duplicate content on your site can make marketing significantly more difficult, especially when you are marketing the non-www version and Google is only showing the www version. Because you can’t tell the search engines which is the “original” copy, you must prevent any duplicate content from occuring on your site.

www and non-www
I prefer to use the www version of my domain (no particular reason, it seems to look better on paper). If you are using Apache as your web server, you can include the following lines in your .htaccess file (change the values to your own of course).

RewriteCond %{HTTP_HOST} ^iwebdev.it
RewriteRule (.*) http://www.iwebdev.it/$1 [R=301,L]

If your webhost does not let you edit the .htaccess file, I would consider finding a new host. When it comes to removing duplicate content and producing search engine friendly URLs, Apache’s .htaccess is too good to ignore. If your website is hosted on Microsoft IIS, I recommend ISAPI Rewrite instead.

Remove all reference to “index.php”
Your homepage should never be referred to as index.htm, index.php, index.asp etc. When you build incoming links, you will always get links to www.iwebdev.it – your internal links should always be the same. One of my sites had a different pagerank on “/” (root) and “index.php” because the internal links were pointing to index.php, and creating duplicate content. Why go to the trouble of promoting two “different” pages at half strength when you can promote a single URL at full strength? After you have removed all references to index.php you should set up a 301 redirect (below) to redirect index.htm to / (root).

Remove Session IDs
I can give advice for PHP users, ASP and CF users should do their own research on exactly how to remove these. With PHP, if the user does not support cookies, the Session ID is automatically inserted into the URL, as a way of maintaining state between pages. Most search engines don’t support cookies, which means they get a different PHPSESSID in the URL every time they visit – this leads to very ugly indexing. There is no ideal solution to this, so I have to compromise. When sessions are a requirement for the website, I would rather lose a small number of visitors who don’t have cookies, than put up with PHPSESSID in my search engine listings (and potentially lose a lot more visitors). To disable PHPSESSID in the URL, you should insert the following code into .htaccess

php_value session.use_only_cookies 1
php_value session.use_trans_sid 0

This will mean visitors with cookies turned off won’t be able to use any features of your site that use sessions, eg logging in, or remembering form data etc.

Ensure all database generated page have unique URLs
This is somewhat more complicated, depending how your site is setup. When I design pages, I’m always wary of the “one page, one url” rule, and I design my page structure accordingly. If a product belongs to 2 categories, I ensure that both categories link to the same URL, or modify the content significantly on both versions of the page so it’s not “identical” in the eyes of the search engine.

301 Redirections
A 301 redirect is the correct way of telling the Search engines that a page has moved permanently. When you still want the non-www domain name to work, you should 301 redirect the visitor to the www domain. The visitor will see the address change and Search Engines will know to ignore the non-www and use the www instead.  Use your .htaccess to 301 redirect visitors from index.htm to / and any other pages that get renamed. eg.

redirect 301 /index.htm http://www.iwebdev.it/
Collect syslog events to database (second part)

10 marzo 2011 Nessun commento

In the previous post you installed the syslog-ng 3.2.2. Now you have to configure our syslog-ng daemon to collect events to database; for this tutorial we choosed a MySQL and Postgres databases. First of all you have to configure the syslog-ng configuration file.

nano /opt/syslog-ng/etc/syslog-ng.conf

Syslog-ng receives log messages from a source. To define a source you should follow the following syntax:

source <identifier> { source-driver(params); source-driver(params); … };

For example you have to define the following source:

source my_source{ tcp ( port ( 614 ) ); };

In syslog-ng log messages are sent to files. The destination syntax is very similar to sources:

destination <identifier> {destination-driver(params); destination-driver(params); … };

You will be normally logging to a file, but you could log to a different destination-driver: pipe, unix socket, TCP-UDP ports, terminals or to specific programs.

destination my_dest{ file(“/var/log/mylog.txt”); };
If you want to collect syslog to database you have to create mysql database and table

CREATE DATABASE `syslog` DEFAULT CHARACTER SET utf8 COLLATE utf8_unicode_ci;

USE `syslog`;

CREATE TABLE IF NOT EXISTS `logs` (
`id` bigint(20) unsigned NOT NULL auto_increment,
`host` varchar(128) collate utf8_unicode_ci default NULL,
`facility` varchar(10) collate utf8_unicode_ci default NULL,
`priority` varchar(10) collate utf8_unicode_ci default NULL,
`level` varchar(10) collate utf8_unicode_ci default NULL,
`tag` varchar(10) collate utf8_unicode_ci default NULL,
`datetime` datetime default NULL,
`program` varchar(15) collate utf8_unicode_ci default NULL,
`msg` text collate utf8_unicode_ci,
`seq` bigint(20) unsigned NOT NULL default ’0′,
`counter` int(11) NOT NULL default ’1′,
`fo` datetime default NULL,
`lo` datetime default NULL,
PRIMARY KEY (`id`),
KEY `datetime` (`datetime`),
KEY `sequence` (`seq`),
KEY `priority` (`priority`),
KEY `facility` (`facility`),
KEY `program` (`program`),
KEY `host` (`host`) )
ENGINE=MyISAM DEFAULT CHARSET=utf8 COLLATE=utf8_unicode_ci;

GRANT SELECT , INSERT , UPDATE , DELETE , CREATE , DROP , INDEX , ALTER ON `syslog` . * TO ‘syslog’@'localhost’;

SET PASSWORD FOR ‘syslog’@'localhost’ = PASSWORD( ‘syslog’ )

Edit syslog-ng config appropriately; add these rows in the destination section (if you want to use Postgres you have to change mysql to pgsql):

sql(type(mysql)
host(“localhost”)
username(“syslog”)
password(“syslog”)
database(“syslog”)
table(“logs”)
columns(“host”, “facility”, “priority”, “level”, “tag”, “datetime”, “program”, “msg”, “seq”)
values(“$HOST_FROM”, “$FACILITY”, “$PRIORITY”, “$LEVEL”, “$TAG”, “$YEAR-$MONTH-$DAY $HOUR:$MIN:$SEC”, “$PROGRAM”, “$MSG”, “$SEQNUM”)
indexes(“host”, “facility”, “priority”, “datetime”, “program”, “seq”));

Syslog-ng connects sources, filters and destinations with log statements. The syntax is:

log { source(src); filter(f_mail); filter(f_info); destination(mailinfo); };

So you have to connect my_source with my_dest:

log { source( my_source ); destination( my_dest ); };
If you want to test the configuration you have to restart the syslog-ng daemon and try to send a syslog event with Kiwi Syslog Gen.

Collect syslog events to database (first part)

9 marzo 2011 Nessun commento

Syslog-ng is an open source implementation of the Syslog protocol for Unix and Unix-like systems. It extends the original syslogd model with content-based filtering, rich filtering capabilities, flexible configuration options and adds important features to syslog, like using TCP for transport. In syslog-ng starting from version 3.0 there is a great option of forward logs directly to database (Postgres, or for that matter to MySQL, Firebird or sqlite database). In comparison with the old way of doing that, namely using a pipe and executing either a wrapper script or mysql client directly, the new way saves a great deal of resources as syslog-ng does not need to start a process every time there is a log message to log. So if you want this features you have to install syslog-ng of version 3.0 or greater with use flag sql enabled. In order to install syslog-ng you have to download the right version from the official site. For our purpose we download the syslog-ng 3.2.2 version (3.2.2/setups/linux-glibc2.3.6-i386).

wget http://www.balabit.com/downloads/files?path=/syslog-ng/sources/3.2.2/setups/linux-glibc2.3.6-i386/syslog-ng-3.2.2-linux-glibc2.3.6-i386.run

Once you downloaded the file you have to grant execute permission to syslog-ng-3.2.2-linux-glibc2.3.6-i386.run.

chmod +x syslog-ng-3.2.2-linux-glibc2.3.6-i386.run

Now you are ready to install the syslog-ng.

./syslog-ng-3.2.2-linux-glibc2.3.6-i386.run

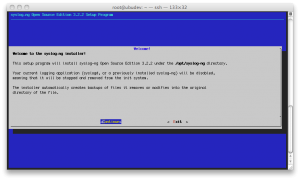
The first screen shows the path where the syslog-ng will be installed; you have to presso “continue”.

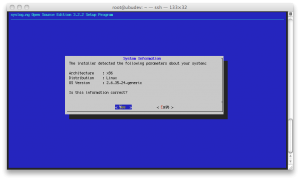
The second screen resumes the parameters about your system; press “yes” if the information are corrects.

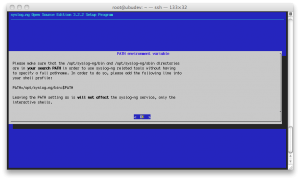
The third screen suggest user to check if the “/opt/syslog-ng/bin” and “/opt/syslog-ng/sbin” directory are in the search PATH. In order to do so, please add the following line into the shell profile:

PATH=/opt/syslog-ng/bin:$PATH

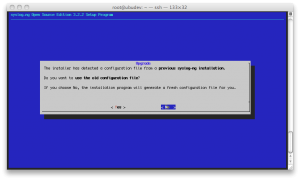
The fourth step checks if there is old version of syslog-ng installed. If the installer has detected a configuration file from a previous syslog-ng installation, the user can use this old configuration file. We choose “no”.

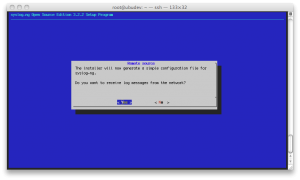
The installer generates a simple configuration file and asks if user wants to receive log messages from the network. We choose “yes”.

The last step asks user if he wants forward the log messages to a remote server; we choose “skip”.
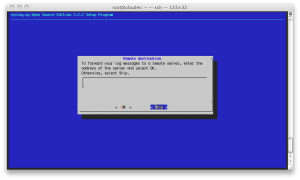
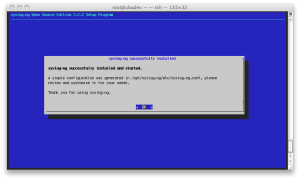
Congratulation, we installed syslog-ng 3.2.2.

Mac OS X e il Quick Look (visualizzazione rapida)

9 gennaio 2011 Nessun commento

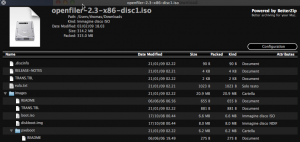
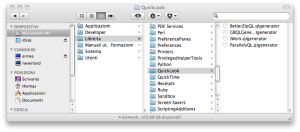
Una delle tante features maggiormente apprezzate del sistema operativo Mac OS X è la possibilità di visualizzare in anteprima il contenuto dei file senza nemmeno aprirli; questa funzione prende il nome di Quick Look, ossia “visualizzazione rapida”. Il programma Quick Look gestisce nativamente file dei formati: PDF, HTML, QuickTime, ASCII e RTF, Apple Keynote, Pages e Numbers, documenti ODF, Microsoft Word, Excel, e PowerPoint (incluso OOXML), immagini RAW. Sebbene il set di file possa sembrare molto riduttivo è utile sapere che la visualizzazione rapida lavora tramite plug-in e quindi è possibile estendere i formati gesti dal programma. Una mancanza che balza subito all’occhio è la “preview” degli archivi come ZIP, TAR, GZip, BZip2, ARJ, LZH, ISO, CHM, CAB, CPIO, RAR, 7-Zip, DEB, RPM, StuffIt’s SIT, DiskDoubler, BinHex, e MacBinary. Esiste un sito (qlplugins) che raccoglie al suo interno tutta una serie di plug-in per caricare attraverso Quick Look le più disparate tipologie di file tra cui gli archivi. Accedendo al plug-in richiesto (BetterZip) procediamo al download e all’installazione del pacchetto. L’installazione avviene semplicemente copiando il file “BetterZipQL.glgenerator” all’interno della directory “/Library/QuickLook”.


Dopo aver copiato il file, per utilizzare il nuovo plug-in è sufficiente aprire una cartella con qualsiasi file che corrisponda ad un archivio, accedere alla visualizzazione rapida ed ecco il contenuto dell’archivio selezionato.


Merry Christmas and Happy New Year

24 dicembre 2010 Nessun commento

Categorie:Personal Tag:

LAMPP vs LD_LIBRARY_PATH

14 dicembre 2010 Nessun commento

Al fine di velocizzare il processo di installazione di una web application spesso si ricorre a package già “pre-configurati” dove l’unica operazione necessaria è la decompressione dell’archivio. Finché l’applicazione web è “semplice” non si riscontrano problemi ma quando è necessario, per esempio, eseguire comandi nativi unix o comandi di terze parti (generatori di barcode, TSK, tool di scan o simili) iniziano i problemi legati alle librerie. L’errore a cui ci si trova di fronte è il seguente:

/usr/local/bin/fls: /opt/lampp/lib/libcrypto.so.0.9.8: no version information available (required by /usr/local/lib/libafflib.so.0) /usr/local/bin/fls: /opt/lampp/lib/libz.so.1: no version information available (required by /usr/local/lib/libewf.so.1) /usr/local/bin/fls: /opt/lampp/lib/libgcc_s.so.1: version `GCC_4.2.0′ not found (required by /usr/lib/libstdc++.so.6)

Il problema fa riferimento ad un conflitto di versione delle librerie  presenti all’interno della directory /usr/local/lib e /opt/lampp/lib. Da una prima analisi si potrebbe obiettare come l’alternativa più immediata sia quella di installare le singole componenti anziché un pacchetto pre-configurato; d’altro canto questa strada non è la soluzione al problema ma piuttosto un workaround. Durante la fase di debug si è visto come il seguente codice:

putenv(“LD_LIBRARY_PATH=/usr/local/lib”);
echo shell_exec(“/usr/local/bin/fls -V 2>&1″);

risolvesse completamente il problema. Si è scoperto quindi che la natura del problema è da ricercarsi all’interno della variabile d’ambiente LD_LIBRARY_PATH. La variable d’ambiente associata alle librerie può essere modificata in diversi file del sistema operativo (/etc/ld.so.conf, bash.bashrc, .profile, putenv via PHP) ma per essere il meno invasivi possibili è stato scelto di modificare lo script di avvio del servizio LAMPP. Aprendo infatti il file /opt/lampp/lampp, nel dettaglio alla riga 100,  si legge l’istruzione:

export LD_LIBRARY_PATH=/opt/lampp/lib:$LD_LIBRARY_PATH

Modificando l’istruzione precedente in:

export LD_LIBRARY_PATH=/usr/local/lib

vengono risolti tutti i problemi dovuti alle dipendenze richieste durante l’esecuzione del comando d’esempio. Riavviando il servizio /opt/lampp/lampp restart infatti si ottiene l’output corretto.

Apple TV: Ripristino impostazioni

11 dicembre 2010 Nessun commento

Per ripristinare le impostazioni di fabbrica della vostra Apple TV è necessario premere i tasti “Menù” e “Fraccia Giù (-)” del Apple Remote per sei secondi finché il led di stato non lampeggia arancio.


A questo punto l’Apple TV dovrebbe entrare in modalità “Apple TV Recovery”, selezionare la voce “Factory Restore” per ripristinare l’Apple TV alle impostazioni di fabbrica.